Efficiency is vital to the success of a homestead. Having favorable outcomes from your homestead goes beyond just having a productive farm. It also includes getting more out of yourself with minimal effort.
When starting a homestead, you must be strategic when choosing the crops to plant. Factors like ease of growing, ease of harvesting, profitability, storage, and nutritional content must be considered to ensure efficiency. In fewer words, you must choose the best crops for homesteading, not just any crop.
To this end, we have compiled a list of some of the best crops for homesteading. We shall be rating their ease of growing, ease of seed storage, profitability, and ease of harvesting on a 5-star scale.
Potato

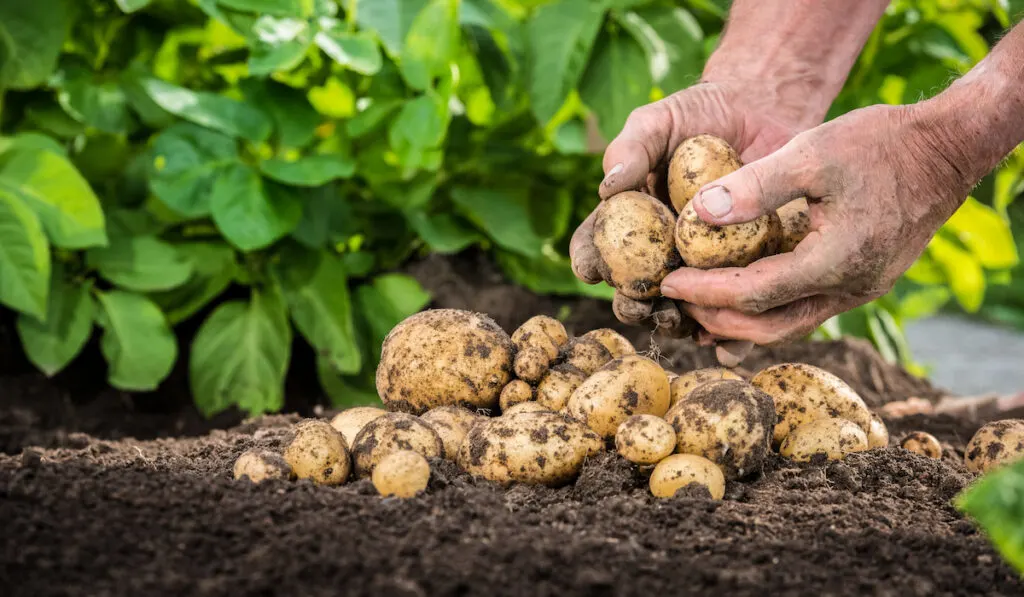
Planting potatoes is one way to get high levels of calories from less space. But more than that, they are easy to grow. You can grow them from seed potatoes (tubers) or true potato seeds. But cultivation with seed potatoes is the more common choice.
To plant a potato, just bury seed potatoes about 3-4 inches in the ground. Each seed potato should be spaced 12 to 14 inches apart. The rows should have a spacing of around 3 feet in between.
Potatoes do well in well-drained, loose soil at temperatures between 45 and 55°F. A location with full sun of up to 6 hours per day would be perfect.
Potatoes are typically planted 2 to 3 weeks before the last spring frost date. This period gives the best results. Although some farmers in the Northern region plant 6 to 8 weeks before the last frost date.
Of course, this is a gamble since there might still be some frost. Potatoes might enjoy cool soil, but extreme cold will still be detrimental.
In the Southern region, winter is usually not very intense. So, some people plant potatoes between September and February. In these regions, potatoes can be cultivated twice a year.
The soil is the ultimate determinant of when you plant your potato crop. When the soil is around 50°F and not excessively wet, you are good to go.
Potatoes are usually ready for harvest within 60-90 days, depending on the variety you have. Harvesting is also easy with potatoes. When it’s time to harvest, dig the sides of the plant, gently lift it out, and grab the potatoes from the roots and surrounding soil.
After getting the potatoes, insert the plant back into the ground, cover with soil, and then water it.
Store the harvested potatoes at 45-60°F for 7-14 days for them to cure. Through curing, their skins become thicker, and some skins cut during harvesting may heal. Curing also makes potatoes last longer in storage.
The storage of harvested potatoes is the same as that of seed potatoes. Keep potatoes away from sunlight, else they will turn green. Store them at 45-60°F in a well-ventilated and humid environment.
If all things go well with your potato plants, you should get considerable profit from selling potatoes. The profitability of your potatoes partly depends on the cultivation method you use.
Generally, organic methods are slightly more expensive and less productive than conventional methods. But organic potatoes are considered to be healthier than conventional potatoes.
Ease of growing: ★★★★★
Ease of harvesting: ★★★★★
Ease of seed storage: ★★★★★
Profitability: ★★★★
Wheat
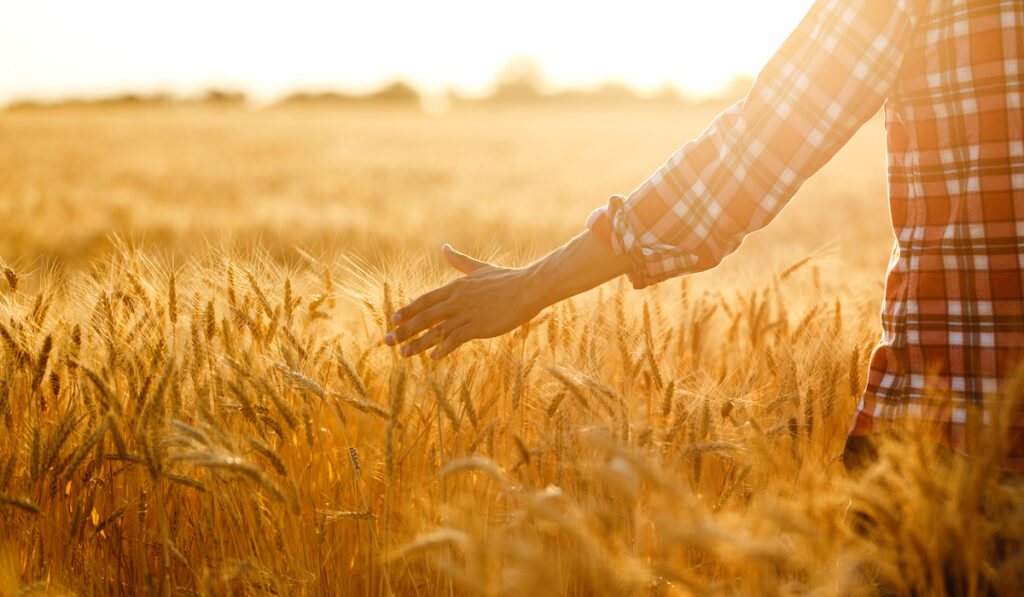

If you are not gluten-sensitive, then you can give heirloom wheat varieties a chance in your homestead. The great thing about planting wheat is that you can make so many things with it. You can make bread, pasta, and many other pastries.
Beyond the many applications of wheat, it is one crop that is easy to grow. Wheat grows in most parts of the US and is available in various types.
There is the winter wheat, which is best grown in fall. In the south, this type of wheat is harvested in spring. But in the north, it is harvested in summer.
Besides winter wheat, there is spring wheat. As the name says, it is planted in the spring and harvested in the fall.
Both winter and spring wheat types can either be soft, hard, or durum.
Soft wheat varieties have low levels of gluten. They are commonly used for cakes, crackers, sauces, and desserts.
Hard wheat, on the other hand, has high levels of gluten. But compared to soft wheat, it has low starch. It is commonly used for making bread.
Durum wheat also has more gluten than soft wheat. But it absorbs more water and is typically applied in the production of pasta.
All in all, the variety you select from those mentioned above will depend on where you live and when you intend to plant them.
You may confirm the best variety for your region from a local extension agent. If you want some seeds, you can check local farm stores and speak with a local farmer.
Wheat seeds are planted with a crank seeder or by broadcasting. Then the soil is raked gently to bury the seeds about 2 inches.
Wheat generally prefers well-drained, loamy soil with a slightly acidic pH. With full sun exposure, you can get the best out of your wheat planting.
Spring wheat matures in around 4 months, earlier than 7-8 months seen in winter wheat. Nonetheless, both types are easy to harvest.
Cut the mature stalk with a scythe or break them with your hands. Gather the stalks and tie them together. Then when they are dry enough, thresh them.
Winter wheat offers relatively more yield than spring wheat. But generally, wheat does not appear to be very profitable. The economic profit of wheat per acre stands at around 8 dollars.
Ease of growing: ★★★★★
Ease of harvesting: ★★★★★
Profitability: ★★
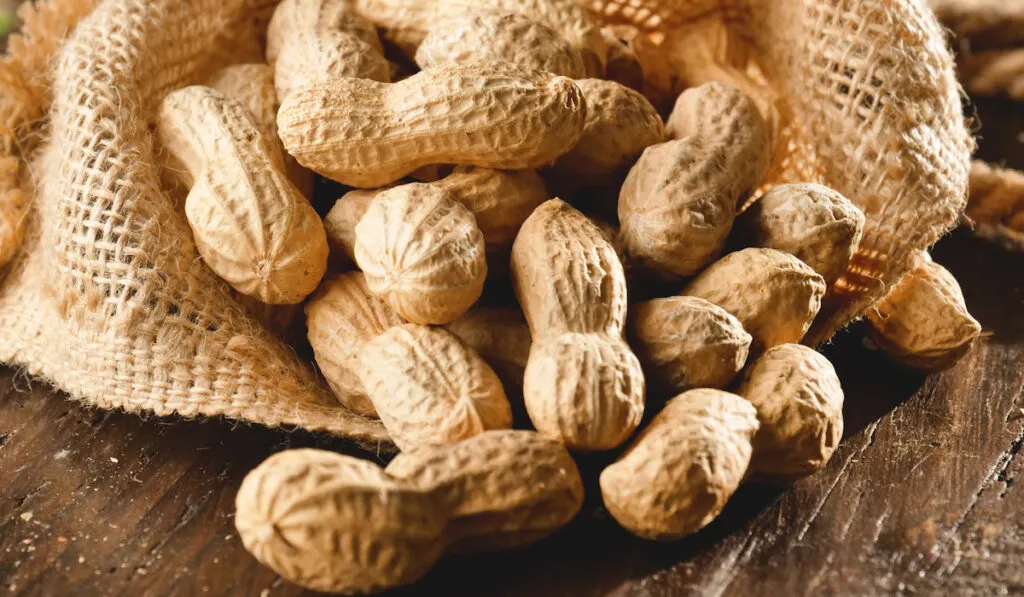
Peanuts

Another option you should consider is peanuts. While in the past they were considered a southern crop, things have shifted with climate change.
Peanuts can be grown in the southern USA and some regions towards the north. Those in the north get more luck when they plant early peanut cultivars and start cultivation indoors.
Peanuts are nutritious – they pack a lot of protein and contain more vitamin B5 than all foods, barring liver.
Peanuts are amazingly easy to grow. In the south, you may start your cultivation outdoors around the date of the last frost.
Plant the seeds 2 inches in the soil and 5 inches apart from each other. Let the row spacing be 2-3 feet. As the seedlings germinate, thin them to 10 inches apart.
In the north, start cultivation indoors in large peat pots. This should be done about a month before the date of the last frost.
Plant the seeds 1 inch deep in the soil and transplant the seedlings outdoors when soil temperature rises to 60-70°F. The seedlings should be placed 10 inches apart on transplanting.
One interesting thing about peanuts is that they do not need nitrogen fertilizer. Being legumes, they already produce their own nitrogen. So do not apply any nitrogen fertilizer to them.
Peanuts are easy to harvest when harvested early. It typically takes peanuts 4-5 months to mature. Once ready to harvest, their leaves will become yellow, and their shells have golden markings.
To harvest peanuts, pull the plants out of the ground when the soil is moist. You may choose to dig instead of pull.
Get soil off the uprooted plant, then let it dry in a well-ventilated place until the leaves crumble readily. At this point, you may remove the pods.
Peanut seeds are peanuts themselves. So, the storage is the same. If you store the unshelled pods in an airtight container, they will remain in good condition for up to a year.
Peanuts can be profitable. It all depends on your yield, the selling price of your output, and your production costs.
Ease of growing: ★★★★★
Ease of harvesting: ★★★★★
Ease of seed storage: ★★★★★
Profitability: ★★★★
Garlic
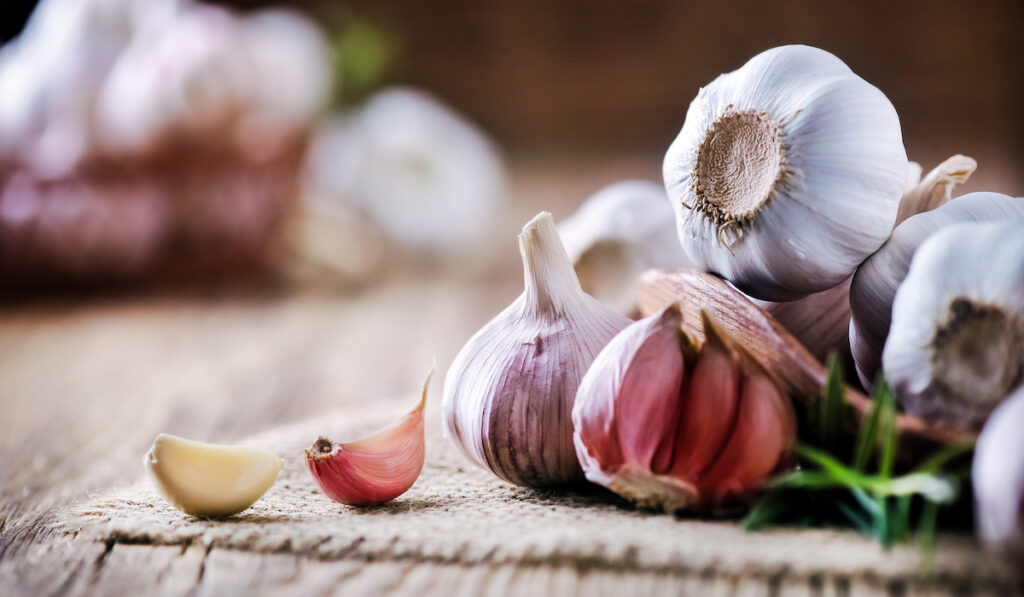
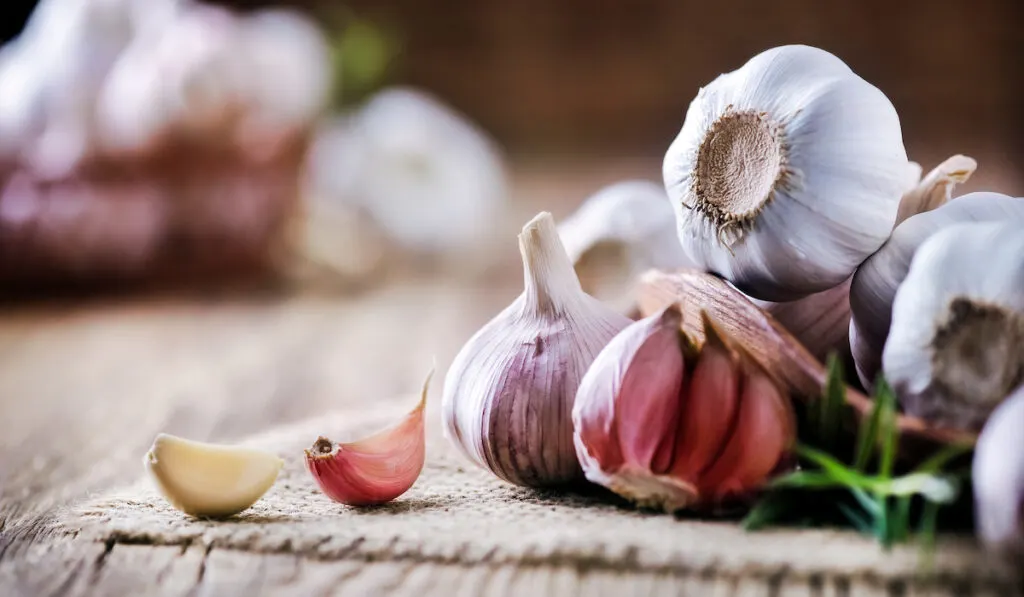
Another root crop you will enjoy on your homestead is garlic. While this crop does not offer calories, it offers a load of other health benefits. Besides, it is an unbelievably valuable condiment.
One interesting benefit of growing garlic is that you can get a high yield from a limited planting space. If you follow John Jeavon’s Biointensive method, you may fit up to 1300 garlic plants in a 100 square foot space.
Garlic plants are also easy to grow. All you need to propagate one is a clove. From one garlic clove, you can get a new bulb with around 5-10 cloves.
When planting garlic cloves, space them by 4-6 inches and bury them 1-2 inches into the ground. Ensure you do not plant them in soil recently used for growing garlic or any crop from the onion family.
Garlic cloves should be planted in well-drained fertile soil. You can grow them in raised beds if you want. Garlic plants need full sun – an average of 6-8 hours daily.
You can grow them in the fall or spring. If you choose to plant in spring, wait till the soil can be worked before planting.
Garlic grows in about 90 days. When ripe for harvest, you will notice the leaves turn brown. Harvest the bulbs by digging up the plant gently or pulling the plant up.
You should harvest the bulbs early, or they may not do well in storage. Also, avoid bruising the bulbs while harvesting them.
After harvesting, lay them down to dry in a shady, airy area. Be careful not to get the bulbs wet during while they are drying, or they may not last long.
After about 2-3 weeks, the tops of the garlic plant should be dry. When dry, cut about 1-2 inches of the tops off the garlic bulbs.
Garlic storage is pretty straightforward. You may make garlic strings out of the bulbs and hang them. Alternatively, you may just store the bulb in airy baskets under dry and cool conditions.
Garlic is quite profitable. Yield might vary, depending on the variety you grow. In general, it is estimated that 1 hectare of garlic can return up to 70% profit through wholesale sales and 150% through retail.
Ease of growing: ★★★★★
Ease of harvesting: ★★★★★
Ease of seed storage: ★★★★★
Profitability: ★★★★★
Tomato
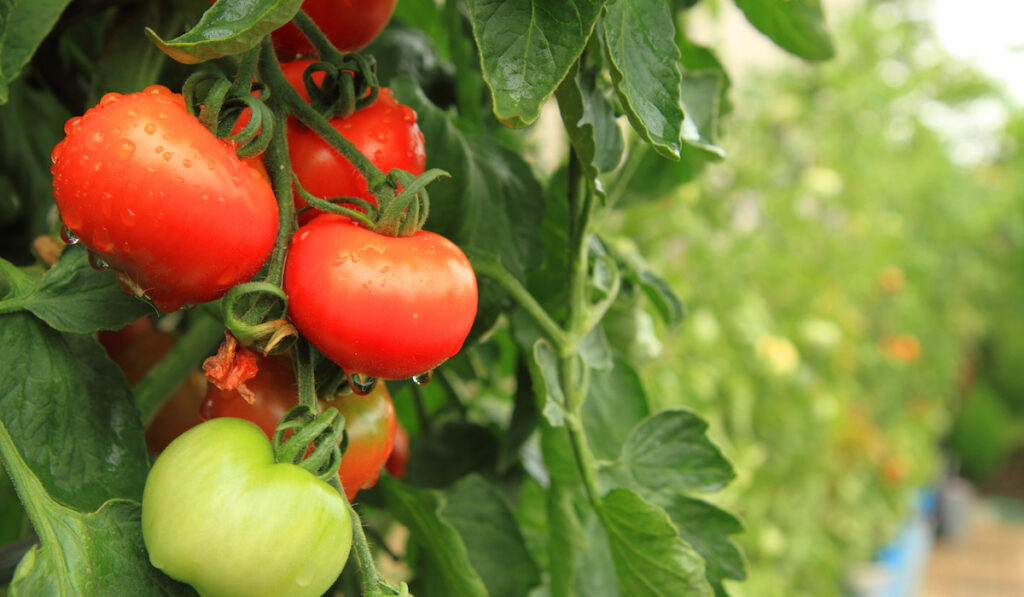

You may also consider adding the ever-popular tomato to your homestead. While they are fruits, tomatoes find a lot of functions as a culinary vegetable. It is used in sandwiches, soups, salads, sauces, and much more.
Tastiness aside, tomatoes are very nutritious. They boast a load of nutrients, including antioxidants, vitamin C, and vitamin B12.
If you choose to plant tomatoes, there are many varieties to choose from. You may plant yellow pear tomato if you want something you can snack on. If you want a disease-resistant tomato plant, then you should consider planting a ‘Celebrity’ tomato.
‘San Marzano’ tomato is a common option if you need tomatoes for sauce. Then ‘Cherokee purple’ tomato is great for slicers.
You may either plant tomatoes from transplants or from seeds. If you are looking for an uncommon variety, you have better chances of getting seeds than transplant. Planting tomatoes with transplants is more straightforward than planting with seeds.
Tomatoes are long-growing season plants. They want warmth, not frost. If you are sowing tomato seeds, it is best to start growing them in a pot. Then transfer outdoors when the soil has warmed up.
Tomato seeds are started in potting soil in a container with drainage holes. They grow best at 70-75°F and in bright light.
After the expected last spring frost date, you may transplant the seedlings outdoors. When you do, be ready to cover them in case a late frost shows up.
The maturity period of tomatoes varies slightly. Early-season tomatoes usually mature in 50-60 days after transplanting. Mid-season types need 60-80 days, while late-season types need 80 days or more.
Tomatoes are ready to be harvested when you notice the first speck of red on the fruit. Harvesting is done by hand-plucking the fruits from the stem gently.
After plucking the tomatoes, keep them indoors where they will ripen further. If you do not want them to ripen quickly, store them at cooler temperatures.
Once you have collected, cleaned, and dried tomato seeds, storage is easy. As long as tomato seeds are kept dry, they can remain viable for up to 5 years.
If all things go right, tomato is profitable. There is the possibility of making a profit of up to $2000 per acre.
Ease of growing: ★★★★
Ease of harvesting: ★★★★★
Ease of seed storage: ★★★★★
Profitability: ★★★★★
Winter Squash
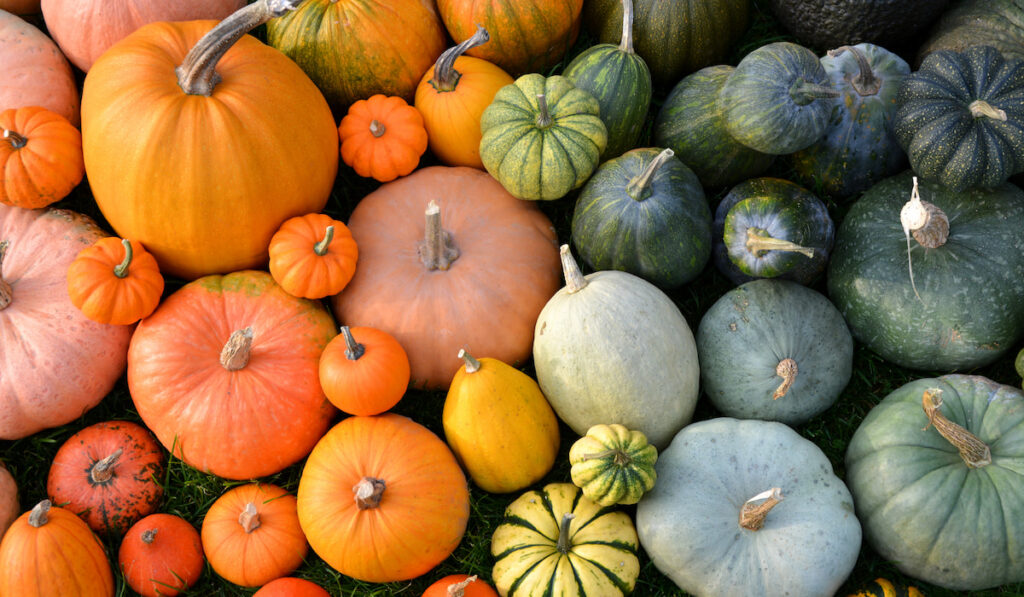
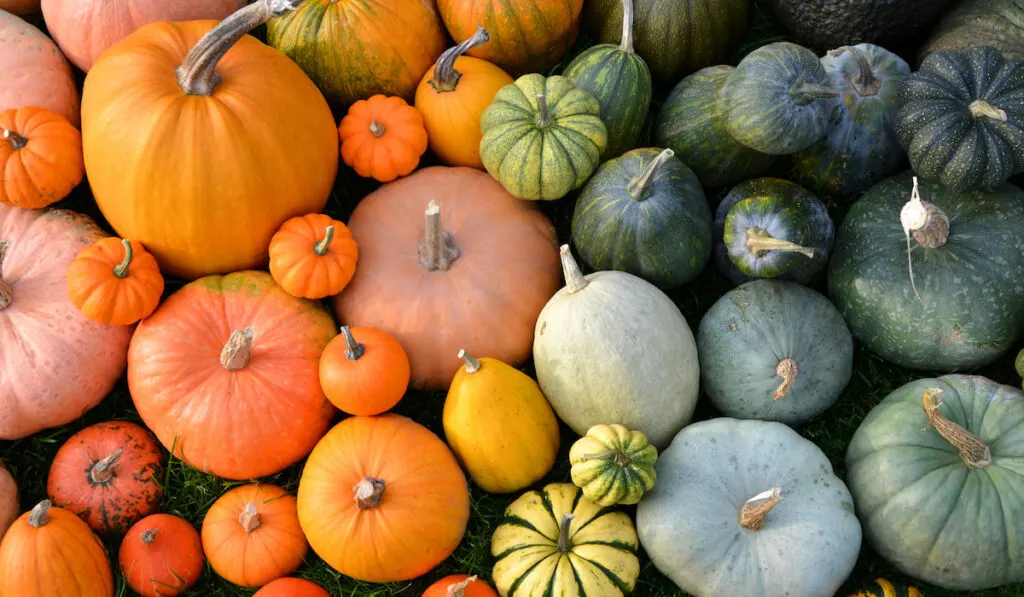
When you are thinking of fruits to have in your homestead, winter squash is one to consider. There are three main cultivars of winter squash: Cucurbita pepo, Cucurbita maxima, and Cucurbita moschata. They are generally rich in fibers, antioxidants, and vitamin C.
Of the three cultivars we stated, C. moschata appears to offer the strongest resistance to diseases and pests.
Although it is called winter squash, this fruit is a warm-season crop. It is typically planted when the soil temperature has risen to around 60-70°F. In other words, winter squashes are best planted when there is no risk of frost anymore.
In the north, they are typically planted in late May. But in the south, planting usually starts in early July. Planting usually starts around this time because winter squashes need long growing seasons.
However, if your region has a short growing season, you may plant your winter squash in a pot 2-4 weeks before the last frost date. Then transplant later.
The rate of successful transplantation of winter squashes is not perfect. So be careful when transferring the seedlings outdoors.
Winter squashes thrive in well-drained, fertile soil in a location exposed to full sun. Ensure they are planted in an area with enough space. Winter squashes typically need 50-100 square feet to spread their sprawling vines.
While it takes a lot of space, a few winter squashes can feed a whole lot of people. In a way, they are still prolific. Yet, you should never overplant them, or you will not get the best outcomes.
When you are ready to plant winter squashes, sow the seeds 1 inch in the ground. Ensure that you space individual seeds by 2-3 feet. Alternatively, you may sow up to 4 seeds closely in a mound in rows separated by 3-6 feet.
Germination usually occurs within a week when the temperature is optimal (70°F). When the seedlings are 2-3 inches tall, thin the number of seedlings in a hill to 2-3 plants. For seedlings of the same height in a row, thin to 1 plant every 2-3 feet.
Winter squashes are usually ready for harvest within 60-110 days, depending on the variety. When ripe, the rind becomes deeply colored and firm, the leaves turn brown and die, and the stems lose vigor.
Winter squashes are best harvested on a dry day. Care should be taken to avoid damaging the stem. Leave 1-2 inches of the stem when cutting the squash.
To ensure that the stem remains undamaged, harvest with pruners or a sharp knife. Also, do not carry the harvested squash by the stem. If the stem detaches from the fruit, it becomes exposed to infections.
Winter squash must be cured for them to last longer. To cure them, just place them out in the sun when the weather is dry. However, if the weather is wet, you can bring them in and place them in a dry, warm area.
The seeds of winter squash are easy to store once dry. All you have to do is store them in a dry container such as an envelope or a glass jar.
Ease of growing: ★★★★
Ease of harvesting: ★★★
Ease of seed storage: ★★★★★
Watermelon
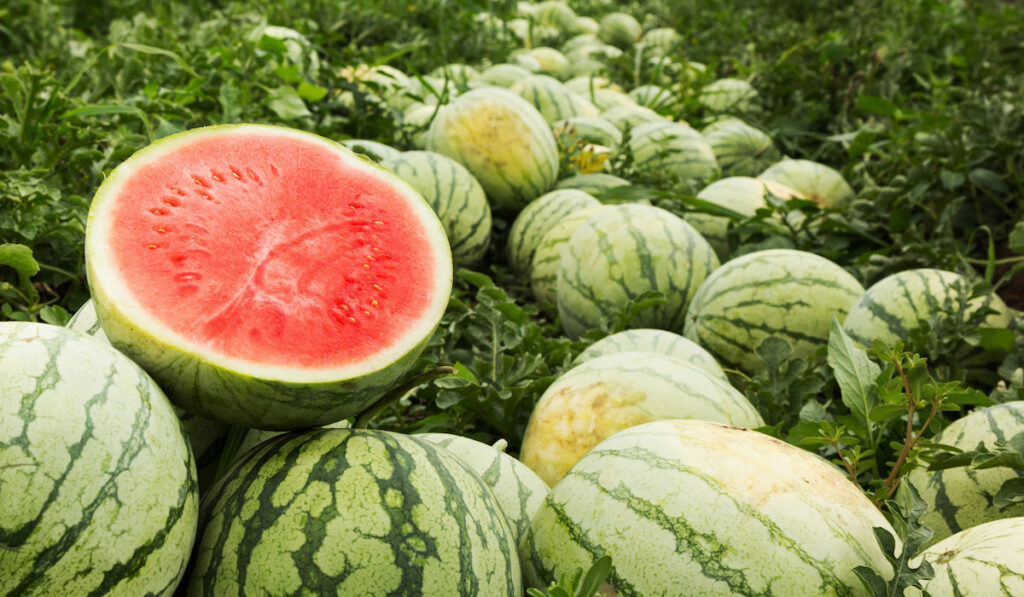

Everyone knows watermelons are juicy and tasty. But they could be even more in the summer. Watermelons can be your source of refreshing juice when the heat gets too much.
Watermelons are easy to grow, too. You can choose to grow the seedless variety, the early season variety, or the main season variety.
As the name says, the seedless variety contains no seeds. It is also relatively sweeter than the seeded types.
The early season variety is also called icebox melon because of its relatively small size. This variety grows faster than main-season watermelons.
To plant watermelons, just sow the seeds 1-2 inches into the ground when the soil is warm (around 65°F). Plant 2-3 seeds in a group separated by 18-24 inches. On germination, you may thin the seedlings in the group, leaving only the best.
In regions where the warm season is not long enough, you may start your watermelon indoors with a soilless potting mix. Then when the temperature of the soil outdoors remains over 50°F consistently, you may transplant them outdoors.
Watermelons thrive in well-drained sandy soil, and they need a lot of water too. Also, the soil pH must be maintained between 6.0 and 6.5.
Depending on the variety you plant, watermelons should be ripe for harvest within 70-90 days. When ripe, you may notice the following signs:
- The rind becomes resistant to poking.
- The spot with which the melon rests on the ground becomes yellow.
- The green curly tendrils near the stem turn brown and start drying out.
- The color of the melon becomes duller.
Harvesting watermelons is as simple as twisting the fruit gently until it detaches from the vine. Do this carefully to avoid damaging the vine.
Their seeds are easy to store. Once you have collected the seeds, rinsed & dried them, store them in an airtight container.
The said container should be stored in a cool, dry, and dark place. The seeds can last for up to 5 years when stored this way.
According to Texas A&M Agrilife Extension, watermelons have a profit potential of up to $2000 per acre. Of course, the profit could also be zero, depending on the outcome of cultivation.
Ease of growing: ★★★★★
Ease of harvesting: ★★★★★
Ease of seed storage: ★★★★★
Profitability: ★★★★★
Papaya

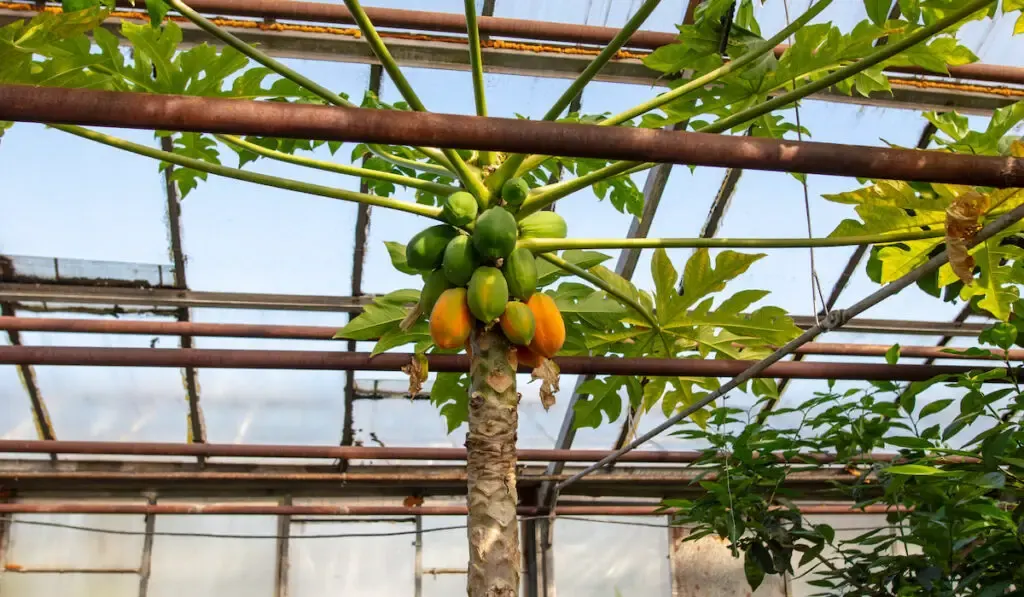
Papaya is an excellent source of vitamin A and vitamin C. It is easy to grow, but you may have to take extra steps to ensure you get the best fruits from it.
You can get papaya seeds from the papaya you buy at the store. But for the best outcomes, try to get seeds from a locally grown fruit.
Papayas need a lot of sunlight, no frost, sufficient water, and well-drained soil rich in organic matter. They do not transplant well.
So, you have to start them outdoors. If you can satisfy these conditions, you can grow papaya.
Sprinkle around a dozen seeds per bed, then cover with compost or soil. After the seeds germinate, you should thin the seedlings – leave only the best ones.
But you should consider the fact that papaya plants can be female, bisexual, and male. Ensure you leave enough female or bisexual plants since they are the only papayas that bear fruits.
A male to female ratio of 1 to 15 is sufficient for pollination. You can tell the males from the females through their flowers – male papayas have long, thin stalks with multiple small blooms.
Depending on the climate in your region, you should get papaya fruits within 11 months. It may come earlier in warmer regions.
Harvesting is pretty much just twisting the fruit gently until it detaches from the stem.
Once cleaned, dried, and stored in an airtight container, papaya seeds can last for up to 3 years. However, their viability decreases with age.
Ease of growing: ★★★★
Ease of harvesting: ★★★★★
Ease of seed storage: ★★★★★
Banana
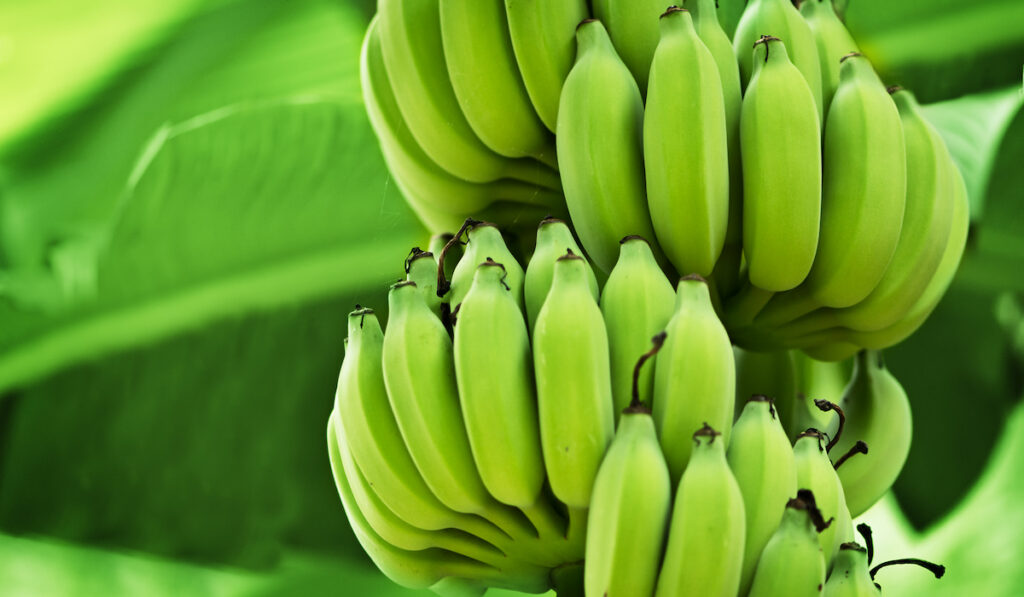

Bananas are fruits, so as expected, they have seeds. But it turns out the seeds from the regular bananas are not viable. Hence, if you intend to grow bananas from them, you have to use suckers.
Bananas are native to tropical regions, and as expected, they will not thrive in cold temperatures. They also will not do well in extremely hot climates. Bananas are best grown in warm, humid conditions with a lot of water.
Most banana variants thrive in full sun – at least 6 hours daily. They are good in slightly acidic, well-drained soil rich with organic matter. The average temperature in the area where bananas are planted should be between 75 and 95°F.
Bananas need adequate space for their roots, and this should be considered when planting them.
For dwarf varieties, leave 8 feet between the plants. For standard variants, leaving at least 12 feet between the plants would do.
You may also plant bananas in pots. But ensure the pot can take at least 15 gallons of water – remember bananas need a lot of water to thrive.
After about 9-12 months, bananas become ready for harvest. They are harvested while still green.
You will know it is time to harvest them when they are well-rounded and filled out. Also, the flowers at the end of the banana would have dried out at this time.
Bananas are harvested by cutting off the whole stalk. Once you are done, store them in a cool, dry, and shady area. They will ripen slowly on their own.
If you want to hasten the ripening process, you may wrap the bananas in plastic bags or expose them to ethylene gas.
Banana production in the US is extremely limited, and there is not sufficient data on its profitability. However, in many other countries where they are grown, bananas seem to be quite profitable.
Ease of growing: ★★★
Ease of harvesting: ★★★★★
Resources
- https://www.gardeningknowhow.com/edible/vegetables/potato/true-potato-seed-growing.htm
- https://www.almanac.com/plant/potatoes
- https://www.motherearthnews.com/organic-gardening/garden-planning/staple-crops-zm0z13jjzsto
- https://www.marysheirloomseeds.com/blogs/news/top-10-homestead-crops
- https://www.gardeningknowhow.com/edible/vegetables/potato/how-to-grow-potatoes-when-to-plant-potatoes.htm
- https://104homestead.com/best-vegetables-lazy-gardeners/
- https://morningchores.com/self-sufficient-gardening/
- https://www.farmprogress.com/story-potatoes-profitable-risky-venture-9-149581
- https://cias.wisc.edu/1992/10/01/organic-potatoes-they-can-be-grown-but-can-they-be-profitable/
- https://www.motherearthnews.com/real-food/growing-wheat-zmaz10fmzraw
- http://nashsorganicproduce.com/recipes/whats-the-difference-between-hard-wheat-and-soft-wheat/
- https://www.gardeningknowhow.com/edible/grains/wheat/growing-wheat-in-home-gardens.htm
- https://www.gardenguides.com/124101-requirements-growing-wheat.html
- https://homeguides.sfgate.com/conditions-need-grow-rice-wheat-corn-soybeans-80104.html
- https://homeguides.sfgate.com/harvest-wheat-berries-hand-72120.html
- https://www.goodhousekeeping.com/home/gardening/a20706839/growing-peanuts/
- https://www.farmprogress.com/peanut/17-years-top-peanut-farmers-data-shows-us-something
- http://www.nass.usda.gov/Publications/Todays_Reports/reports/pnpr1919.pdf
- http://www.georgiacrop.com/peanut-production-increases-and-soybeans-hit-record-says-usda-report
- https://www.lsuagcenter.com/~/media/system/5/5/6/4/55646c0ef9404ad2073c46b006e13b51/peanuts%20-%20ukpdf.pdf
- https://growagoodlife.com/growing-garlic
- https://www.burpee.com/gardenadvicecenter/vegetables/garlic/garlic/article10268.htm
- https://harvesttotable.com/how_to_grow_garlic
- https://en.farmforage.com/9722-proper-cultivation-of-garlic-as-a-business-profitabi.html
- https://www.almanac.com/plant/winter-squash
- https://harvesttotable.com/how_to_grow_winter_squash/
- https://cedarcirclefarm.org/tips/entry/winter-squash-saving-seed
- https://www.gardeners.com/how-to/video-slideshow-growing-tomatoes/7902.html
- https://harvesttotable.com/how_to_grow_tomatoes
- https://www.gardeningknowhow.com/edible/vegetables/tomato/harvest-time-for-tomatoes.htm
- https://www.growveg.com/guides/how-to-prepare-and-store-seeds-from-your-tomato-plants/
- https://aggie-horticulture.tamu.edu/smallacreage/crops-guides/vegtables/tomatoes/
- https://www.bhg.com/gardening/vegetable/fruit/how-to-grow-watermelon/
- https://www.seedsavers.org/grow-watermelon
- https://www.tropicalpermaculture.com/growing-papaya.html
- https://homeguides.sfgate.com/germinate-papaya-37694.html
- https://www.ehow.com/info_8432412_spacing-planting-banana-trees.html
- https://www.bananalink.org.uk/all-about-bananas/
- https://www.tropicalpermaculture.com/growing-bananas.html#
- https://www.starkbros.com/growing-guide/how-to-grow/fruit-trees/banana-plants/harvesting
- https://www.thespruce.com/banana-tree-growing-profile-3269353
- https://www.gardeningknowhow.com/edible/fruits/banana/banana-tree-harvesting.htm